Section Four
Accounts
General Description
The Accounts Menu
Billing and Payments
Entering a Cash Payment
Printing an Invoice
Printing a Receipt
Printing an Account
Layby Payments
Debtors
Creditors
Totals of Receipts
Summaries
Business Operation Summary
General Description
The Accounts module is used to bring the main accounting features and information screens of BOOKKEEPER into one place.
Some of the options in this module are also in their "Home Modules" for example, the Job and Sale, Expense and Stock Purchase summaries are contained in this module as well as in their respective modules.
This has been done to make the program more flexible and easier to use.
The Accounts module options include printing of invoices, receipts and accounts as well as managing layby payments, finding out information on how much you are owed by others and how much you owe, listing the income your business has received and the summaries of your jobs and sales, expenses and stock purchases.
In the Summaries menu the Business Operation Summary gives you an overall picture of how your business is performing.
The Accounts Menu
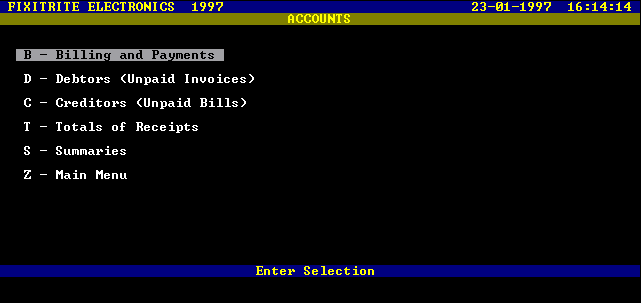
Screen Presentation of the Accounts Menu
Billing and Payments
The Menu below appears when "B" is selected from the Accounts Menu.
This menu is used to manage the printing of accounts, invoices, receipts and manage layby payments.
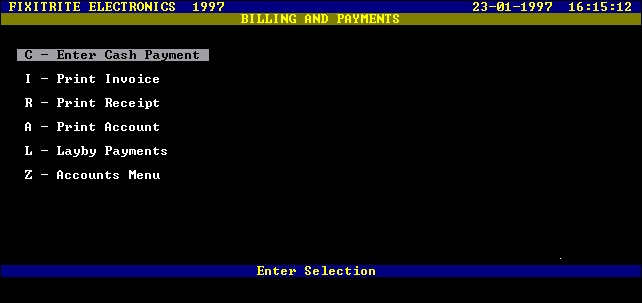
Screen Presentation of the Billing and Payments Menu
Enter Cash Payment
This option is used to record cash payments for jobs and sales that have already been invoiced.
When this option is used the Job Status becomes "P" (Paid).
The amount of the payment must be the full amount owing.
Print Invoice
This option is used for finding and displaying a job record in the computers database and if required, to print an invoice.
Select "I" at the Billing and Payments menu and enter the job number that you want to produce the invoice for. If you do not enter a number and just press the return key, you will return to the Billing and Payments menu.
If you type in a job number that is not valid, ie one that does not exist then an appropriate message will appear on the screen.
If a valid job number is entered, then the job details are displayed on the screen, and if the status of the job is "I" (Invoiced) or "U" (Not Completed) then an invoice will be printed.
Any other status will not allow an invoice to be printed as the job may already have been paid.
This option can also be used to produce a second copy of an invoice as a reminder notice.
When the invoice is printed then the Job Status is automatically set to "I" (Invoiced).
To find out how to manually set the status of a job see Section Two Changing Record Details.
Print Receipt
This option is used for finding and displaying a job record in the computers database and if required, to print a receipt. Select "R" at the Billing and Payments menu and enter the job number that you want to produce the receipt for.
If you do not enter a number and just press the Enter key, you will return to the Billing and Payments menu.
If you type in a job number that is not valid, ie one that does not exist then an appropriate message will appear on the screen.
If a valid job number is entered, then the job details are displayed on the screen, and if the status of the job is "I" (Invoiced) or "P" (Paid) or "R" (Receipt Issued) then a receipt will be printed. Any other status will not allow a receipt to be printed as the job may not be complete.
The Job Status automatically is set to "R" (Receipt Issued) when the receipt is printed.
To find out how to manually set the status of a job see Section Two Changing Record Details.
Print Account
This option is used to print a statement of account for your clients that you have setup an account with. It will list all previously invoiced jobs up to, and including, the date specified.
The overdue, current and total amount owing are printed with a remittance advice attached.
This option should be used at the end of the billing period which matches the clients account type.
The most common account type is the Twenty Eight day or Monthly account which means that at the end of the month all invoices accrued in that month are totalled as the current amount owing, with any outstanding amounts from the last account sent being overdue.
The overdue amount should be paid immediately and the current amount before the 28th of the month (so that it will not become overdue).
Layby Payments
Selecting "L" at the Billing and Payments menu will bring up the Layby Payments menu which is shown below.
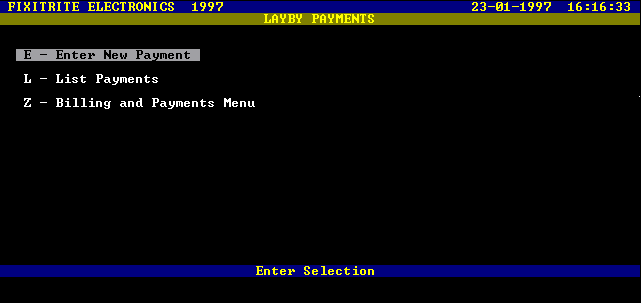
Screen Presentation of the Layby Payments Menu
Enter New Payment
This option, as the name suggests allows you to enter payments made by the client on a layby.
You will be asked for a layby number and if an invalid number is entered you will get an appropriate
message.
A valid layby number will display the layby details with the prompt "Press Enter to Continue E to Exit".
If the displayed layby record is the one to which the payment is to be made then press Enter and you will be prompted for the date (default is the current date) and then the balance is shown and you are then prompted for the amount of the payment being made.
A Layby Record can then be printed which shows all the layby details and the payments made to date, including the balance owing. This is the client's copy.
List Payments
You will be prompted for a layby number and the Layby Details will appear.
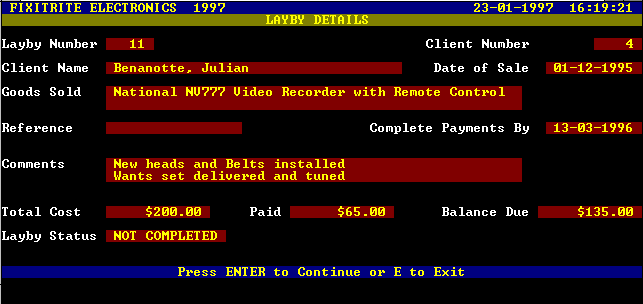
Screen Presentation of Layby Details
If Enter is pressed then a list of all payments made will appear on screen.
A Printout can be made if desired.
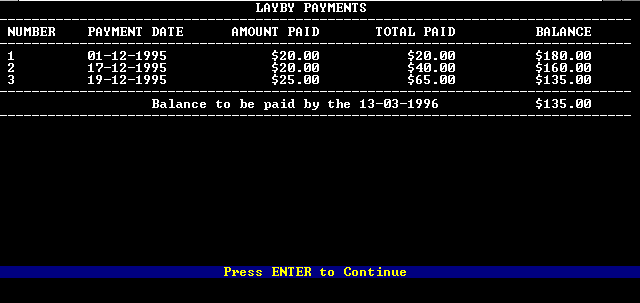
Screen Presentation of Layby Payments
Debtors (Unpaid Invoices)
This option is also found in the Jobs and Sales Module (Section Two) and is described there .
It is located in the Accounts module to make BOOKKEEPER more flexible.
Creditors (Unpaid Bills)
By Selecting "C" (Creditors) at the Accounts menu, you are prompted to select from Unpaid Expenses or Unpaid Stock Purchases.
Both these options are found in their respective modules and are described there.
Unpaid Expenses can be found in Section Five and Unpaid Stock Purchases in Section Six.
Total of Receipts
By typing "T" at the Accounts menu, you are prompted to enter an Authority Code.
Only the Management code will access this function.
A listing of all jobs and sales for which you have been paid will be produced.
Among the information will be Job Number, Date Paid, Client Number and Name, Job Type, Status and Amount. The total will be displayed and a printout can be made if desired.
This option is found in the Jobs and Sales Module and is described more fully there.
Summaries
By selecting "S" at the Accounts menu a Summaries menu will appear.
This option is included for convenience and combines all the summaries from the other modules into one menu.
You can Select a Job and Sale, Expense, Stock Purchase or a Business Operation Summary.
Details about the Job and Sale Summary can be found in Section Two.
Details about the Expense Summary can be found in Section Five.
Details about the Stock Purchase Summary can be found in Section Six.
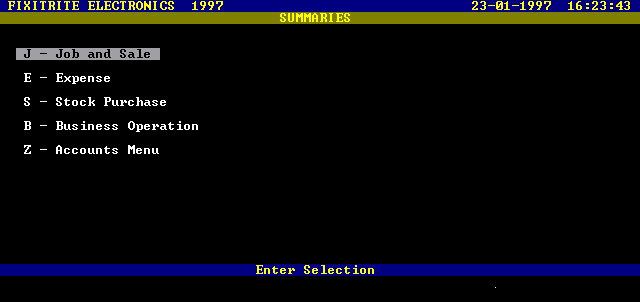
Screen Presentation of the Summaries Menu
Business Operation Summary
Selecting "B" at the Summaries menu will display the Business Operation Summary Menu from which you can choose to do a Monthly or Year to Date Summary of business performance.
This option requires the management authority code to operate.
After entering your authority code you will be shown the opening stock value at the start of the financial year with the option to update or modify the value. You are then presented with the stock on hand value also with an option to update or modify as before.
The computer will take a few moments and produce a screen with the information similar to a profit and loss statement.
The information can be useful in telling how well your business is operating.
A printout can be produced if desired.
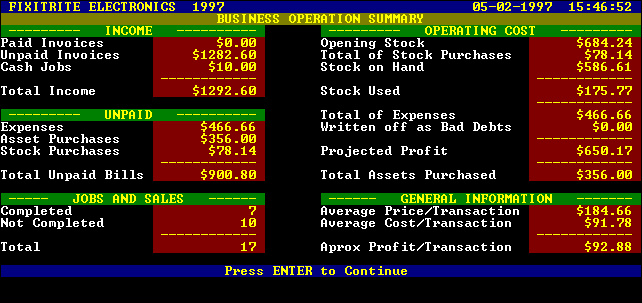
Screen Presentation of Business Operation Summary (Year to Date)
© Copyright Stamy Criticos 1997 ANKA Electronics


