Section Eight
System Management
General Description
The System Management Menu
Selecting Data to work with
Current Financial Year
Last Financial Year
Archived Data on Hard and Floppy Disks
Setting System Options
Authority Codes
Costing
Auto Inventory Update
Screen Type
Printer Setup
Business Logos
Utilities
Database Utilities
Formatting a Disk in Drive A:
Making a Set of Data Disks
Backing up Data to Drive A:
Restoring Data from Drive A:
Creating a Financial Year
General Utilities
End of Financial Year
Printing a Fax Cover Sheet
Print Letterhead
Change Record Details
General Description
The System Management module is used to perform the housekeeping functions of your bookkeeping system as well as offering some business utilities.
You can work with the current financial year as well as last financial or any financial years data.
When working with another financial years records you are limited to viewing only and therefore cannot change the details of the record unless you use the Change Record Details option found under the utilities menu.
The Set System Options allows you to set the Authority Codes for both the user and the management levels, the costing of jobs and other details with respect to client accounts, the selecting of automatic stock level adjustment, the type of video monitor screen being used, Printer setup and the setting of your Business Titles.
The Utilities menu allows the formatting of blank disks, the creation of a set of data disks, the backing up and the restoring of data to and from these disks, the ability to create a financial year and the ability to create letterheads and fax cover sheets as well as changing any record details in the database being currently worked with.
This allows for any errors to be adjusted easily.
An End of Financial year option is included to enable you to "Close off the Books" at the end of the financial year.
This means that on the 30th June of each year all jobs and sales that have not been completed or where the client has been invoiced and any stock purchases and expenses that have not been paid or purchase orders and returns that are outstanding are marked as "Carried over to the New Financial Year" and the complete database then becomes last financial years database.
All the records that were carried over are then automatically given new numbers in the new financial year.
The System Management Menu
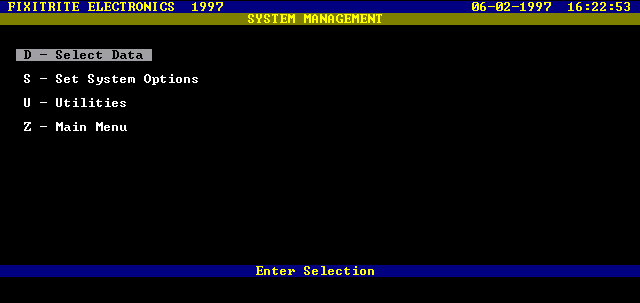
Screen Presentation of the System Management Menu
The Select Data Menu
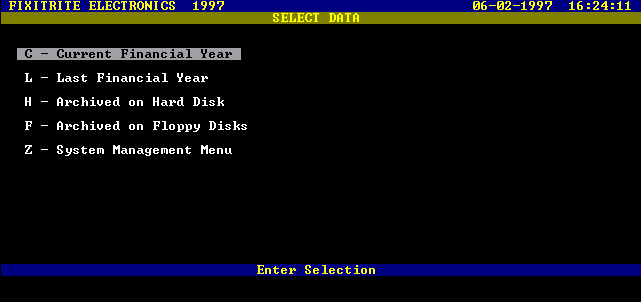
Screen Presentation of the Select Data Menu
Current Financial Year
This option is used for changing the computers database to the current financial year.
By selecting "C" at the Select Data Menu, your working data changes from archived (another years data) to the current financial year. A message will appear if you are already working with the current data and try to select this option.
Last Financial Year
This option is used for changing the computers database to last financial year.
By selecting "L" at the Select Data Menu, your working data changes from the current financial year to last financial year.
This selection is for convienence, as most lookups from previous years are from the financial year just passed.
Archived Data on Hard Disk
This option is used to view past financial years data records.
If you select "H" from the Select Data Menu you will be presented with a list of available years of data from which to choose.
You can have 50 years of data on the system
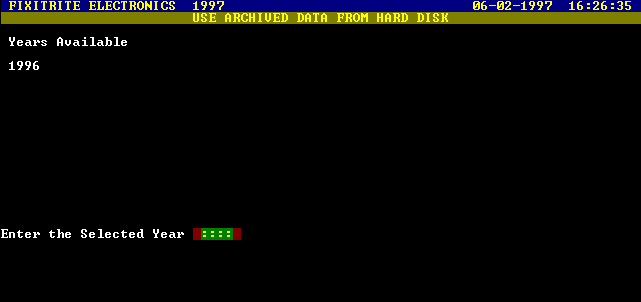
Screen Presentation of Selecting Archived Data from Hard Disk
Archived Data on Floppy Disks
This option is also used to view past financial years data records.
If you select "F" from the Select Data Menu you will be prompted to enter each of the four data disks one at a time into the disk drive.
Once this operation is complete the financial year of the data is displayed in the top left corner of the screen next to the business name as in all the other modules main menus.
You can then return to the Main menu and start any of the other modules from there.
Note: Some of the menu options will be "ghosted" on a colour screen and invisible on a monochrome screen as they are logically unable to be used whilst using archived data.
Setting System Options
Selecting "S" at the System Management menu will bring up the Set System Options menu on the screen.
This menu is used to maintain the authority codes used for accessing data and functions.
There are two levels of authority code, User and Management.
You can also set up the cost of your Labour, Payment Terms and Markup on Parts as well as other options. (See later in this section under Costing).
The Auto Inventory Update is used to link Jobs and Sales and Stock Purchases to the Inventory by adjusting stock levels as you buy, sell and use stock and parts.
This menu is also used to set the type of screen you are using as BOOKKEEPER will display its output differently on a colour and monochrome screen.
You can also set the type of printer you are using as well as customising your business titles.
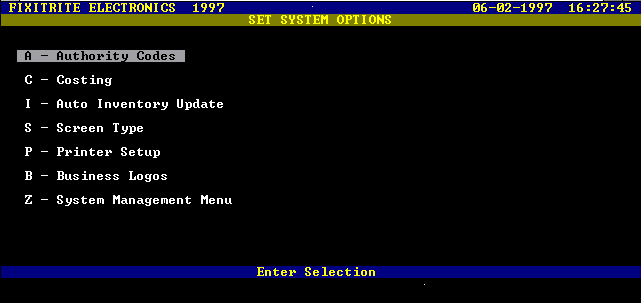 Screen Presentation of Set System Options Menu
Authority Codes
Selecting "A" at the Set System Options menu will prompt you to enter an authority code.
You may enter either the User or the Management Codes and the program will give you access to change the entered code.
Only the management code can be used to change the management code to a new value of any combination of alpha and numeric characters in either lowercase or uppercase. The codes must be at least four characters in length up to a maximum of twenty characters.
The management code has unlimited access to all data and functions whereas the user code is limited to normal operations only.
When the program asks for an authority code and an invalid code is typed, then a message is displayed with an audible warning and the computer is frozen for five seconds.
If the user code is entered when the system requires a management code then you are returned to the menu from which the selection was made without the message or audible warning.
You will be prompted for a management code if it is required to perform the selected function.
The management code or the user code can be used to change the user code to a new value of any combination of alpha and numeric characters in lowercase or uppercase with the same rules for length, as above.
When the program is shipped the codes are preset with the user code set to "user" and the management code set to "manage".
At any time if you are prompted for a code pressing the Escape key will return you to the previous menu from which you selected the option.
If a typing error is made whilst entering the code then use the Backspace key to delete the last character typed.
Note : The preset values are in "lowercase" as opposed to "UPPERCASE" text.
You can have a mixture of either case in your codes.
Costing
This option is used to set values that BOOKKEEPER uses when costing jobs.
You can set the values of the following parameters.
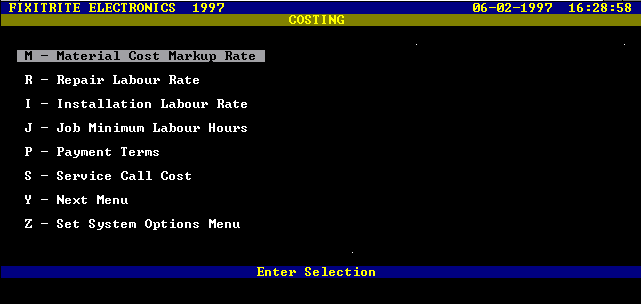
Screen Presentation of Costing Menu (1)
Material Cost Markup Rate :
This is the markup in percent of the cost of your parts to the price you charge the client.
The default value is 30%. The smallest value that you can set is 0.1% with anything less entered becoming zero.
Repair Labour Rate :
This is the cost per hour of labour. The default value is $25.
The smallest value that you can set is $0.01 with anything less entered becoming zero.
Installation Labour Rate :
This is the cost per hour of installation labour.
The default value is $15. The smallest value that you can set is $0.01 with anything less entered becoming zero.
Job Minimum Labour Hours :
This is the minimum time of labour charged to a job.
If you are changing a job's details and the labour entered is less than this amount then the time is set to this minimum.
The default value is set to 0.5 hour. The smallest value that you can set is 0.1hr with anything less entered becoming zero.
Payment Terms :
This is the amount of days for clients with no account to pay an invoice.
It is printed on the remittance advice. The default value is 7 days. The smallest value that you can set is 1 day.
Service Call Cost :
This is the amount of a service call charged to the client.
The smallest value that you can set is $0.01 with anything less entered becoming zero. The default value is $25.
Next Menu :
Select the second Costing menu
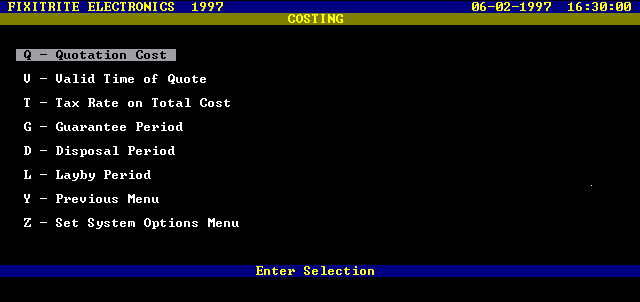
Screen Presentation of Costing Menu (2)
Quotation Cost :
This is the charge to your clients for you to produce a quotation on a job.
The default cost is $10 and the client is automatically invoiced this amount if they do not accept to proceed with the job.
The smallest value that you can set is $0.01 with anything less entered becoming zero.
Valid Time of Quote :
This is the time that a quote will remain valid. The default value is 30 days.
The smallest value that you can set is 1 day.
Tax Rate on Total Cost :
This is the tax rate on the total cost of the job. This is automatically calculated when producing an invoice or quote.
The default value is 0%. The smallest value that you can set is 0.1% with anything less entered becoming zero.
Guarantee Period :
This is the time that you guarantee your repair work and goods sold to the client.
The default value is set at 30 days. The smallest value that you can set is 1 day.
Disposal Period :
This is the time that you will hold uncollected goods for the client.
The default value is set at 30 days. The smallest value that you can set is 1 day.
On job sheets and invoices the message "No responsibility is taken for uncollected goods xx days after work is completed" is printed.
Layby Period :
This is the time that your clients who have purchased goods on a layby have to fully pay for the goods.
The default value is set at 90 days. The smallest value that you can set is 1 day. The date is automatically calculated and printed on the layby record for the client.
Previous Menu :
Returns you to the first Costing menu.
Auto Inventory Update
The Auto Inventory Update is used to link Jobs and Sales and Stock Purchases to the Inventory by adjusting stock levels as you buy, sell and use stock and parts.
You can choose to link either or both Jobs and Sales and Stock Purchases.
Set Screen Type
Selecting "S" at the Set System Options menu will display the Set Screen Type menu
You can select from Monochrome, Colour Graphics Adaptor (CGA), Enhanced Graphics Adaptor (EGA) or Video Graphics Adaptor (VGA).
Press the letter of your choice and the display will change to the selected type.
The range of colours displayed on a colour screen can vary slightly between monitor types.
When monochrome mode is selected, some of the menu items are invisible when using archived data as they are logically unable to be used.
The same options on a colour screen are "Ghosted" (Faint on the screen).
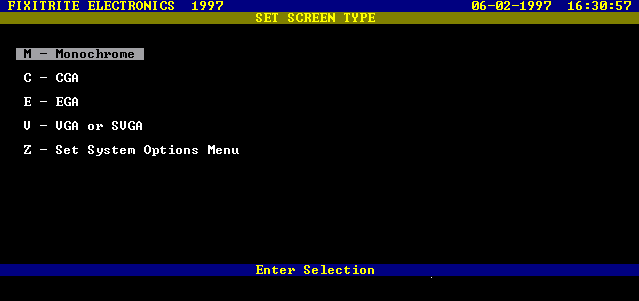
Screen Presentation of Set Screen Type Menu
Printer Setup
Selecting "P" at the Set System Options menu will display the Printer Setup menu
You can select from displaying your printer setup or you can set the printer type.
BOOKKEEPER supports Hewlett Packard Laserjet or compatible, Epson dot matrix or compatible and a standard ASCII printer.

Screen Presentation of Printer Setup Menu
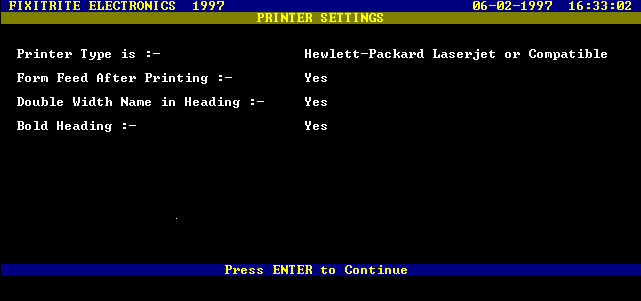
Screen Presentation of Display Printer Settings
Set Business Logos
Selecting "B" at the Set System Options menu will get you to the Business Logos Setup menu where you can display and set your business title (Printed on top of your printouts) as well as your remittance advice postal address.
This allows you to have a different postal address from the work address.
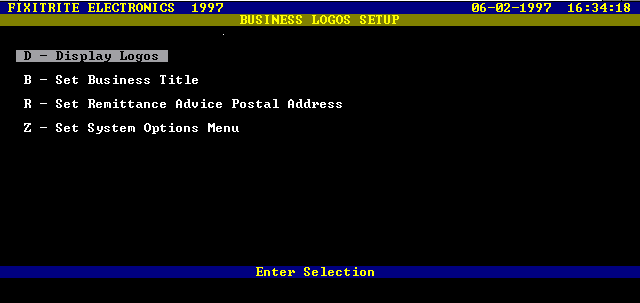
Screen Presentation of Business Logos Setup Menu
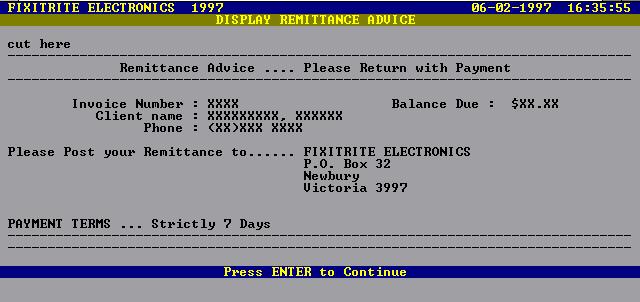
Screen Presentation of Display Remittance Advice
Utilities
Selecting "U" at the System Management menu will display the Utilities menu.
Two selections can be made "Database" and "General".
In the Database option you can format a disk in drive A: or create a set of data disks or backup and restore data to and from these disks.You can also create a financial year to restore data from another system or old computer.
In the General option you can use the End of Financial Year option to close off your books for the year and start new ones for thenew financial year.
You can also print a fax cover sheet, a letterhead and change any record's details with no restrictions.
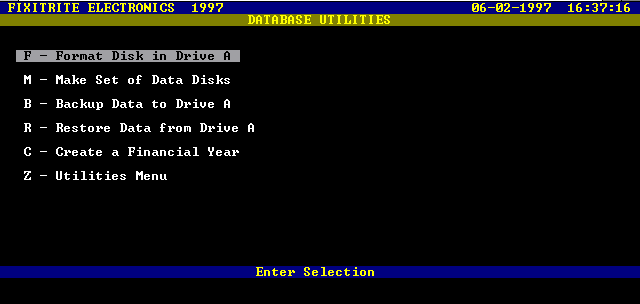
Screen Presentation of Database Utilities Menu
Format a Disk in Drive A:
By selecting "F" at the Database Utilities menu you can format a blank disk in the first disk drive of your computer.
This drive is usually called Drive A:.
This option requires the DOS path command in your AUTOEXEC.BAT to contain the directory of where to find the format command. (See your DOS manual for details of how to modify your autoexec.bat file).
Make a Set of Data Disks
By selecting "M" at the Database Utilities menu you can create a set of data disks using four formatted disks in drive A: of your computer.
You will be asked to insert four disks into your drive one at a time. Each disk will have an identification file put on it containing the backup disk number, business name and the financial year of the data put on it so it can be recognised later. Label your disks with their backup disk number and financial year.
You will be firstly prompted to insert Data Disk One into the drive and press Enter.
From then on follow the instructions on the screen.
Note : This option will not function and an error message will be produced if the disk that is inserted into drive has not been previously formatted.
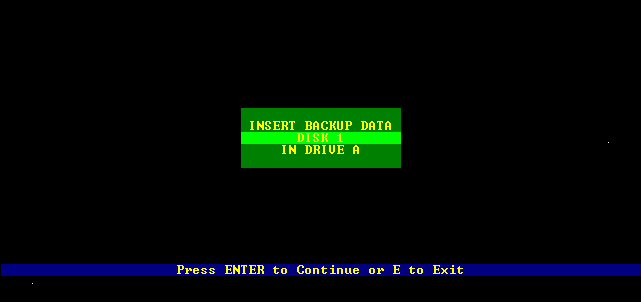
Screen Presentation of Make Set of Data Disks
Backup Data to Drive A:
By selecting "B" at the Database Utilities menu you can backup your database to the backup data disks created in the last option.
The backup is performed by copying the data in the computers database to the disks placed in drive A: of your computer.
You will be asked to insert four disks into your drive one at a time.
Each disk will have its identification file checked to make sure it is the correct disk.
If it is not the correct disk then a message will be displayed to let you choose if you want to overwrite the data on the disk and have a new identification put on it.
It is therefore important to label your disks with the backup disk number and the financial year of the data so as not to have the problem of important data being overwritten.
Backing up of data should be performed at least once per week and the disks kept in a safe place.
You will be firstly prompted to insert data disk one into the drive and press Enter.
From then on follow the instructions on the screen.
When you are quitting the program BOOKKEEPER will prompt you automatically to perform a backup of your data, and if you choose to ignore the messages then the reminders are changed until you cannot exit the program without a backup being performed or a management authority code being used to overide..
Note : This option will not function and an error message will be produced if the disk that is inserted into Drive A: has not been previously formatted or is not a valid data disk.
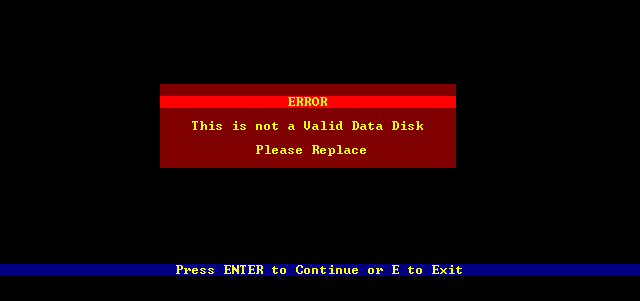
Screen Presentation of an Error Message
Restore from Drive A:
By selecting "R" at the Database Utilities menu you can restore a database from the backup data disks created in the last option.
The restore is performed by copying the data in the disks placed in drive A: of your computer to the computers currently selected financial year's database.
You should select the financial year you want to restore as the current working database before you perform the restore. If the financial year doesn't exist then create it with the "Create Financial Year" option explained below.
You will be asked to insert four disks into your drive one at a time. Each disk will have its identification file checked to make sure it is the correct disk.
If it is not the correct disk then a message will be displayed to let you choose if you want to overwrite the data in the computer database anyway.
It is therefore important to label your disks with the backup disk number and the financial year of the data so as not to have the problem of important data being overwritten.
Restoring of data should only have to be performed when the computer has gone faulty and all previous records lost or corrupted.
You will be firstly prompted to insert data disk one into the drive and press Enter.
From then on follow the instructions on the screen.
Note : This option will not function and an error message will be produced if the disk that is inserted into Drive A: has not been previously formatted or is not a valid data disk.
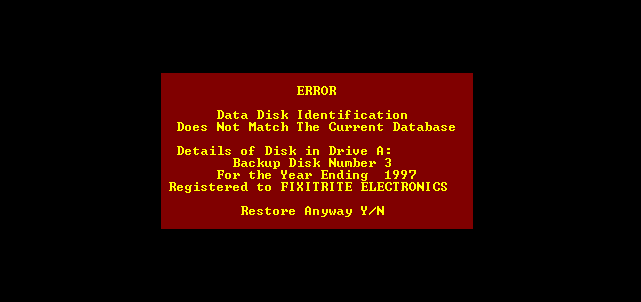
Screen Presentation of an Error Message
Create a Financial Year
By selecting "C" at the Database Utilities menu you can create a financial year.
This function is to allow you move BOOKKEEPER to another computer if you update to a newer computer or your computer fails. After creating the year, you then go to the Select Data menu and select the Archived on Hard Disk option. Enter the year you just created and switch to that year.
You will then be at the System Management menu.
From there select the Utilities menu and choose Database.
Select Restore from Drive A and follow the instructions on your screen.
(See above on how to restore data from a floppy drive.)
General Utilities Menu
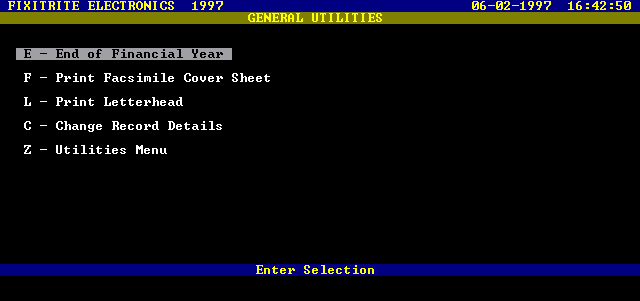
Screen Presentation of General Utilities Menu
End of Financial Year
Selecting an "E" at the General Utilities menu will permit you to execute the end of the financial year option which is included to enable you to "Close off the Books" at the end of the financial year.
This option requires the Management Code to operate.
On the 30th June of each year or the nearest close of business to that date, all jobs that have not been completed or the client has been invoiced and any stock purchases and expenses that have not been paid or Purchase Orders and Returns that are outstanding are marked as "Carried over to the New Financial Year".
The complete database is then saved as last financial years database. All the records that were carried over are then automatically given new numbers in the new financial years database.
This operation should be performed only after backing up the financial years data to a set of data disks, as that data will be modified when the End of Financial Year option is executed.
(See later section on backing up data for more information).
The current stock levels (stock on hand) is entered at the prompt and is then saved to the last financial years database as the "Closing Stock" for that year and also saved to the current year's database as the "Opening Stock".
If the value of the stock on hand is not known at the time of using this option just press Enter to accept the value shown and the correct amount can be entered when using the Business Operation Summary found in the Accounts Module at a later date.
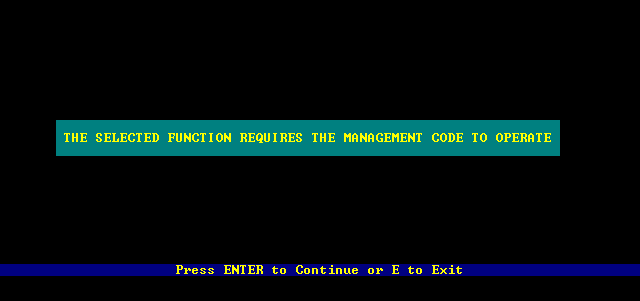
Screen Presentation of Selecting End of Financial Year
Once the End of Financial Year option has been executed, the data in the current financial year will be all the "carried over" transactions. Those transactions will also be contained in the last financial years database but marked as "carried over".
It is therefore important to do a backup of both the financial years records once you have checked each years data.
Print Facsimile Cover Sheet
This option is selected by pressing "F" in the General Utilities menu. You will be prompted for information to be entered onto the sheet and then the complete preformatted sheet will be printed with the information on it.
If ENTER is pressed at each prompt then a blank cover sheet will be printed which can be photocopied and filled out manually at a later date.
Print Letterhead
This option is also found in the General Utilities menu. The complete preformatted letterhead will be printed with your business title, postal address, date and time on it.
Change Record Details
This option is a management only function to enable you to access any record in either the current or any financial years database, directly or data on floppy disks put into Drive A:.
You can change any details of the record and so you must be careful that you don't change details that will cause inaccuracies in your data.
An example of this would be to find a job record and change the client for whom the job was done by changing the client number stored in the job record. (See section two on the information stored in a job record).
If you select "C" at the General Utilities menu then you are warned that you need the management code to operate the change record option and if you proceed, then you will be asked to enter a valid management code.
Once entered successfully the following warning is displayed. Pressing Enter will display the Change Record Details menu.
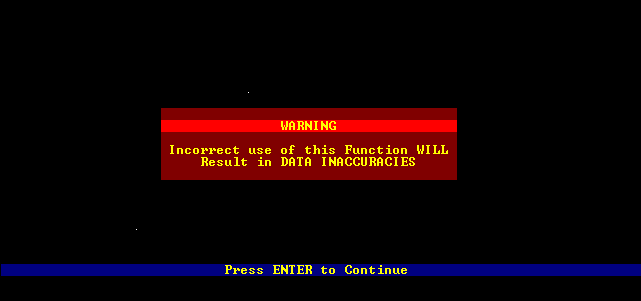
Screen Presentation of the Warning Message
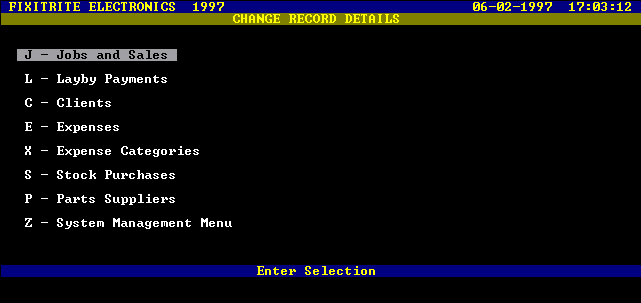
Screen Presentation of Change Record Details Menu
You can change any record's details by firstly entering the Job Number, Layby Number, Client Number, Expense Number, Expense Category Number, Stock Purchase Number or the Supplier Number.
You will then be presented with the complete record to enable you to check if it is the record you want to modify.
If it is not type "E" to exit and no details will be changed, otherwise press ENTER and each detail of the record is then presented one at a time with the option to skip or modify it.
© Copyright Stamy Criticos 1997 ANKA Electronics


 Screen Presentation of Set System Options Menu


